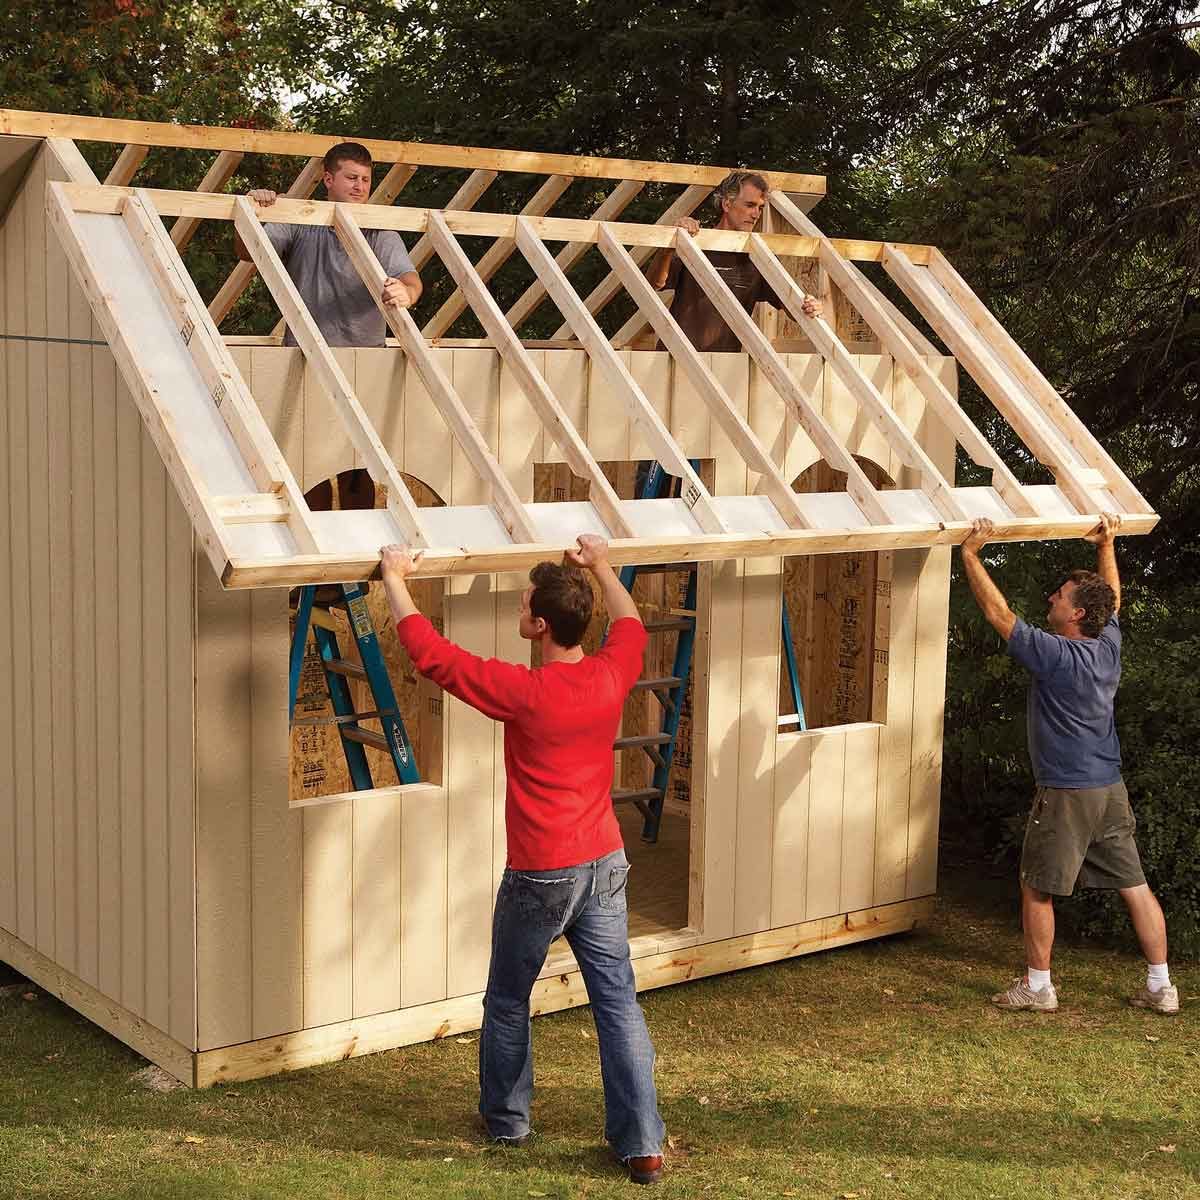
Step-by-step guide to building a garden shed on a budget

Step-by-step guide to building a garden shed on a budget

Alright, let's talk about building a garden shed on a budget. It's a fantastic project, trust me. You'll get a super useful space for storage, tools, or even a little potting area, and you'll learn some handy DIY skills along the way. Plus, it'll be way cheaper than buying a pre-made shed.

Planning is Key, My Friend:

First things first, let's make a plan. Grab a notepad and a pen, and let's get down to business:

Size Matters: Figure out the size you need. Do you want a little shed for basic storage, or something bigger to house your gardening gear and maybe even a workbench? Measure the space you have available and decide on the dimensions that will work best. Don't forget about doors and windows, too!

Location, Location, Location: Choose the perfect spot for your shed. Make sure it's level ground and has enough sunlight (if you plan on using it for gardening). Think about drainage, too, and how you'll get the shed materials to the location.

Budget Breakdown: Write down how much you're willing to spend. You'll need to factor in everything, from materials to tools to any unexpected costs that might pop up. Don't be afraid to ask for help from friends or family if you need an extra hand!

Design Inspiration: Do some research and look at different shed designs. There are tons of free plans available online (check out Pinterest or your local lumberyard), or you can create your own design. You can go for a classic shed shape or get creative with a more modern or rustic look.

Materials List: Once you know the size and design, you'll need to create a materials list. Check out local lumberyards for prices and make sure you're buying the right amount of everything. Remember to factor in things like screws, nails, paint, and even a level!

Building the Shed - Let's Get Our Hands Dirty!

Alright, now it's time to get building. Follow these steps, and remember:

Foundation First: You need a strong foundation for your shed. There are several options:

Concrete Slab: The most durable and long-lasting option. It's great for heavier sheds, but it requires some labor and time.

Wooden Skids: A simpler and faster option, but make sure the wood is treated for outdoor use.

Concrete Blocks: Another budget-friendly option. Make sure they are level and properly secured.

Framing the Walls: Once your foundation is in place, you can start framing the walls. Use pressure-treated lumber for the bottom plates to prevent rot. Cut the wall studs to the right height and attach them to the plates.

Roof Support: The roof is the next big step. You'll need to build the roof trusses (or you can purchase pre-made trusses). Attach the trusses to the wall plates, ensuring they're strong and stable.

Sheathing and Siding: Cover the walls and roof with plywood sheathing. This provides support and creates a smooth surface for the siding. Choose your preferred siding material: wood, vinyl, or metal.

Doors and Windows: Now's the time for the finishing touches. Install the doors and windows you've chosen. Make sure they fit well and are properly secured.

Roofing and Finishing Touches: Finally, put on your roof. You can choose shingles, metal roofing, or even a green roof (if you want to be eco-friendly). Once your roof is on, add the finishing touches: paint, trim, and anything else to make it look just right.

Tips and Tricks for Building a Budget-Friendly Shed:

Secondhand Savings: Look for deals on used materials. Check out local salvage yards, online marketplaces, and even Craigslist. You might be surprised by what you find.

Repurposed Materials: Get creative and use recycled materials whenever possible. Old pallets can be turned into a beautiful garden fence or even incorporated into your shed design.

Tool Rentals: Rent tools instead of buying them. You'll save money and won't have to worry about storage.

Volunteer Help: Don't be afraid to ask friends or family for help. They might have skills or tools you need. Plus, it's a fun way to spend time together!

Safety First, Always!

Wear safety glasses and gloves whenever you're working with tools.
Make sure the area is well-lit and clear of obstacles.
Take breaks when needed to avoid fatigue.

Celebrate Your Achievement!

Once your shed is built, celebrate your success! You've learned new skills, saved money, and created a valuable addition to your garden. Enjoy your new space!

Remember, building a garden shed on a budget is all about planning, resourcefulness, and a little elbow grease. So, get out there, embrace the challenge, and watch your vision become reality. Happy building!

Share:

Efficient tips for building a lean-to shed for storage

Efficient tips for building a lean-to shed for storage

Alright, let's talk lean-to sheds. You know, those simple, practical little structures that are perfect for storing everything from gardening tools to holiday decorations? Building one is a great way to add some extra storage space to your yard, and it's a project that's totally doable for DIYers.

But before you start hammering away, let's get organized and make sure we're building a lean-to shed that's both efficient and effective.

First, let's talk about the basics:

Location, Location, Location: Find a spot for your lean-to that's level, well-drained, and close to where you'll be using it most. If you're in an area with lots of snow or heavy wind, you might want to consider adding some extra bracing for support.
Size Matters: Don't go overboard! Start by sketching out a basic plan. Figure out what you need to store, and design your lean-to accordingly. A good rule of thumb is to make it a little bigger than you think you'll need. Trust me, you'll thank yourself later.
Material Matters: Lumber is the go-to material for lean-to sheds. Consider using pressure-treated wood for the base and floor joists, as this will resist rot and moisture. For the walls and roof, you can choose from a variety of wood options depending on your budget and aesthetic.

Now, let's get into the nitty-gritty of building your lean-to shed:

1. Laying the Foundation:

The Base: You'll need a sturdy foundation to support your lean-to. Here are a couple of options:
Concrete Slab: A classic, but it requires some concrete work.
Pressure-Treated Skirts: An easier option, simply create a frame of pressure-treated lumber that will be anchored to the ground.
The Floor: For the floor, use joists spaced 16 inches apart and lay plywood on top. Make sure the floor is level and even.
The Back Wall: Now, let's get that back wall up. This is the wall that will be attached to your house or existing structure. Make sure it's plumb (perfectly vertical) and that it's securely fastened to the existing structure.

2. Building the Roof:

Rafters: The rafters are the supports for your roof. They should be strong enough to handle the weight of the roofing material. You'll need to calculate the length of the rafters based on the size of your lean-to.
Roof Sheathing: This is the plywood that goes over the rafters. Make sure to use plywood that's specifically designed for roofing.
Roofing Material: Choose your roofing material based on your budget and aesthetic. Shingles are a popular choice for lean-to sheds, but there are also metal roofing options available.

3. Adding the Sides:

The Front Wall: This is the wall that will be facing the open side of your lean-to. Use studs to frame the wall and make sure it's plumb and square.
The Side Walls: These walls are relatively simple to build. Just frame them with studs and attach them to the back wall and the front wall.

4. Finishing Touches:

Doors and Windows: Consider adding a door for easy access to your shed and maybe even a small window for ventilation.
Siding: Cover the walls with siding. There are many different options available, from wood to vinyl.
Painting or Staining: Give your lean-to shed a fresh coat of paint or stain to protect it from the elements and give it a finished look.

Now, let's talk about some tips to make your lean-to shed even more efficient:

Maximize Space: Utilize vertical space by adding shelves and storage bins.
Think About Ventilation: Good ventilation is essential to prevent moisture buildup. Consider adding louvered doors or vents to your shed.
Make it Secure: Add a padlock to your door or install a motion-activated light for security.
Consider Insulation: Insulating your shed will help keep it warm in the winter and cool in the summer.

Remember, building a lean-to shed is a great way to improve your storage space and make your yard more organized. It's a project that requires a bit of time and effort, but with a little planning and creativity, you can build a shed that fits your needs perfectly. So get out there, gather your tools, and start building!

Here are some additional resources that you might find helpful:

Home Depot: They offer a wide variety of building materials and tools, as well as helpful resources for DIY projects.
Lowe's: Another great source for building materials and tools, and they also offer DIY project guides and classes.
YouTube: You can find endless tutorials and videos on how to build a lean-to shed.

Good luck, and remember, there's no need to be intimidated by this project. Take your time, follow the steps, and enjoy the satisfaction of building something with your own two hands!

Share:

Build your own shed: a complete guide to 12x16 storage

Build your own shed: a complete guide to 12x16 storage


Hey there, fellow DIYers! Are you tired of tripping over your gardening tools, bikes, and seasonal decorations? Feeling overwhelmed by the clutter in your garage? Well, listen up, because building your own 12x16 storage shed is the perfect solution!

This guide will walk you through the entire process, from planning to painting, with tips, tricks, and a healthy dose of encouragement along the way.

Step 1: The Planning Phase

Before you start hammering nails, let’s get organized.

Location, Location, Location: Where will your shed live? Choose a spot with good drainage, preferably level ground. Consider access for your car and the direction of the sun for maximum light.
Budget: Decide how much you're willing to spend.
Materials: Do you want to go with traditional wood framing or opt for a prefabricated kit? Each has pros and cons, so research is key.
Style: Do you want a classic shed, something with a modern flair, or a quirky design?
Permits: Check with your local building department. You might need a permit, especially for larger structures.

Step 2: The Foundation

A solid foundation is the backbone of your shed.

Concrete Slab: This is the most durable option. It requires some heavy lifting and pouring but provides stability and longevity.
Concrete Blocks: A cost-effective alternative, concrete blocks can be stacked to create a strong base.
Pressure-Treated Wood: A budget-friendly option, this is perfect for a shed built on level ground.

Step 3: Framing the Walls and Roof

Now the real construction begins!

Framing Lumber: Choose quality lumber for your framing. 2x4s or 2x6s are common choices.
Wall Construction: Build the walls in sections on the ground for easier handling. Use corner posts, top plates, and studs to create the framework.
Roof Framing: The roof design can be simple or more complex. Consider a gable roof for classic charm or a hip roof for a modern feel.
Sheathing: Plywood or OSB (oriented strand board) is used to cover the frame, creating a solid base for siding and roofing.

Step 4: Siding and Roofing

Time to give your shed its personality!

Siding Options: Vinyl, wood, metal, and fiber cement are popular choices. Consider your budget, style, and maintenance preferences.
Roofing Options: Asphalt shingles, metal roofing, and even cedar shakes offer various levels of durability and aesthetic appeal.
Window and Door Installation: Plan the size and location of windows and doors, allowing for adequate ventilation and access.

Step 5: Finishing Touches

This is where you add the finishing touches.

Painting: Choose a color that complements your home or garden. Be sure to use a primer for long-lasting paint protection.
Interior Finish: Insulate your shed for year-round use. Add shelves, cabinets, and a workbench to create a functional space.
Landscaping: A little landscaping around the shed can enhance its aesthetic appeal and create a welcoming environment.

Step 6: The Joy of Completion

Congratulations! You've now built your own 12x16 storage shed! Take a moment to admire your handiwork and enjoy the feeling of accomplishment.

Tips for Success:

Measure Twice, Cut Once: Accuracy is crucial. Take your time and double-check measurements before making any cuts.
Use Safety Gear: Wear safety glasses, gloves, and a dust mask when working with tools and materials.
Take Breaks: Working on a project like this can be tiring. Take breaks to avoid fatigue and ensure your safety.
Enjoy the Process: Building your own shed is a rewarding experience. Take your time, have fun, and learn something new.

Here are some additional things to consider:

Electrical Wiring: If you plan to have lights or outlets in your shed, it’s essential to consult an electrician for proper wiring.
Ventilation: Adequate ventilation is essential for preventing moisture buildup and mold growth. Consider adding vents or installing a fan.
Climate Control: Insulate your shed if you plan to use it during extreme temperatures. Consider adding a heating or cooling system for year-round comfort.

Building your own shed is a fantastic DIY project that can provide years of storage solutions. With careful planning, attention to detail, and a little elbow grease, you can create a beautiful and functional space that you'll be proud of for years to come.

Don’t hesitate to reach out if you have any questions or need more advice along the way. Happy building!

Share:

8x10 shed plans for cheap diy builders

8x10 shed plans for cheap diy builders


Hey there, fellow DIY enthusiasts! Tired of clutter taking over your garage or backyard? Dreaming of a space for your hobbies, tools, or just a little peace and quiet? Well, buckle up, because we're about to embark on a journey to build your very own 8x10 shed, and guess what? We're doing it on a budget!

Building a shed doesn't have to break the bank. In fact, with a little planning and ingenuity, you can create a functional and stylish space that fits your needs and your wallet. This guide is your roadmap to a successful shed construction project, from the initial planning stages to the final finishing touches.

Let's Start with the Basics:

First things first, we need to get our ducks in a row. Decide what you'll be using the shed for. Do you need a workshop, a storage space, a cozy reading nook? This will help determine the features you need, like windows, doors, shelves, and maybe even electricity.

Next, let's talk about the location. Pick a spot in your yard with good drainage and access. Consider sunlight and wind direction. Don't forget to check your local building codes, too! You'll need to know about permit requirements, foundation types, and setbacks.

Time for the Foundation:

The foundation is the bedrock of your shed, literally. It's what keeps your structure stable and level. You've got a few options here, each with its own pros and cons.

Concrete Slab: This is the most durable option, offering long-lasting support. However, it requires a bit of concrete pouring, which can be a daunting task for some.
Concrete Blocks: A good middle ground between cost and durability. You can use pre-made blocks or even recycled concrete blocks for a more eco-friendly approach.
Pressure Treated Skids: The simplest and often most affordable option. These are pressure-treated timbers that you can lay on the ground, providing a level surface for your shed.

Building the Walls:

Now we're getting into the heart of the construction! Choose your wall materials wisely.

Pressure Treated Lumber: A good choice for the bottom plates and posts of your walls. It resists moisture and decay, making it ideal for outdoor use.
Plywood: Use this for the sheathing, which will cover the framework of your walls. You can get away with standard plywood, but if you want added strength and moisture resistance, consider using OSB (oriented strand board).
Siding: This is the finishing touch, the "skin" of your shed. You have a wide range of options, from affordable vinyl siding to more traditional wood siding or even corrugated metal. Choose something that fits your budget and style.

Framing the Roof:

The roof is the protective crown of your shed. Here's what you'll need:

Rafters: These are the main beams that support your roof. You can use pre-cut rafters or cut them yourself. Don't forget to consider the roof pitch â€" a steeper pitch will help with drainage.
Roof Sheathing: Like the wall sheathing, this is the plywood layer that goes on top of the rafters. It provides a solid surface for the roofing material.
Roofing Material: Asphalt shingles are a popular and affordable choice, but you can also opt for metal roofing for a more durable and modern look.

Adding the Finishing Touches:

We're almost there! Time to bring your shed to life with the finishing touches:

Doors and Windows: Choose the right size and style to suit your needs. You can even get creative with window treatments and add some personality to your shed.
Insulation: If you plan on using the shed year-round, consider adding insulation to the walls and ceiling. This will help keep it cozy in the winter and cool in the summer.
Flooring: A simple concrete floor can work for a shed, but you can get fancy with options like vinyl flooring or even wood planks.
Paint or Stain: Give your shed some personality with a fresh coat of paint or stain. Choose colors that complement your home or create a vibrant and inviting atmosphere.

A Final Word of Advice:

Building a shed is a rewarding experience. You'll get a sense of accomplishment, and you'll have a personalized space you can enjoy for years to come. Don't be afraid to ask for help from friends or family. And remember, if you're not comfortable with a particular step, there are always professionals who can help.

It's Your Shed!

This guide has given you a great starting point, but remember, it's your shed, and you can customize it to your liking. Get creative, have fun, and don't be afraid to experiment! The possibilities are endless, and with a little effort and determination, you can build a shed that truly reflects your personality and enhances your outdoor space.

Share:

Essential guide for building a 12x16 shed in your yard

Essential guide for building a 12x16 shed in your yard


Okay, so you've finally decided to build a shed. Maybe you're tired of tripping over garden tools, need a dedicated space for your woodworking projects, or just crave a little private sanctuary in your backyard. A 12x16 shed is a great size â€" roomy enough for storage, workbenches, or even a cozy hangout spot, but not so big that it becomes a daunting project.

This guide is for you â€" the DIY enthusiast with a healthy dose of determination and maybe a few power tools already in your garage. We're going to walk through the entire process, from planning to paint, with plenty of tips and tricks along the way. Ready to get your hands dirty? Let's dive in!

Step 1: Planning and Permits

Before you even think about grabbing a hammer, sit down and make a plan. First, choose a spot for your shed. Consider sunlight, drainage, and proximity to your house. If your shed will be near a fence line, check your local zoning regulations.

Speaking of regulations, make sure you’re aware of any permits required for your project. This can vary wildly depending on your location, so a quick call to your local building department will save you headaches later.

Step 2: Foundation Time!

Now, let's talk foundation. For a shed this size, a concrete slab is a popular choice. It's durable and level, offering a solid base. However, if you're looking for a more budget-friendly option, consider a treated lumber foundation. Just make sure the lumber is properly treated to withstand moisture and decay.

Concrete Slab Foundation:

1. Excavate and Level: Dig out the area for your slab, making it slightly larger than the shed footprint to allow for a concrete overhang. Use a level to ensure everything is perfectly flat.
2. Build a Form: Construct a form around the perimeter of your excavation using treated lumber or plywood. Make sure the form is level and sturdy.
3. Pour the Concrete: Now for the fun part! Order concrete from a local supplier. It's usually delivered in a truck with a chute, so make sure your driveway or the shed location can accommodate the truck. Pour the concrete into the form and use a trowel or a screed to level it.
4. Let It Cure: Allow the concrete to cure for at least a week before moving on to the next step. Cover the concrete with plastic sheeting during the curing process to prevent it from drying out too quickly.

Treated Lumber Foundation:

1. Level the Ground: Use compacted gravel or sand to create a level base for your lumber foundation.
2. Lay Down Pressure-Treated Lumber: Install pressure-treated lumber as the foundation beams. Make sure the beams are spaced appropriately to support the weight of the shed. Use concrete blocks or treated lumber piers to support the beams and keep them level.
3. Add a Moisture Barrier: A plastic vapor barrier placed between the ground and the lumber will help prevent moisture from reaching the lumber, extending its lifespan.

Step 3: Framing the Shed

Alright, it's time to start building!

1. Frame the Walls: Start by cutting the bottom plates for your walls. Use a level to make sure the plates are perfectly straight. Then, cut and install the studs, which will be the vertical supports for your walls. Use a stud finder to locate the existing wall studs if you are building near your house. This will help you align your shed walls with your house.
2. Build the Roof: Once the walls are complete, you can move on to the roof. Start by creating the roof trusses. You can purchase pre-made trusses, or you can build your own. Once the trusses are in place, you can install the roof sheathing. This will provide a base for the shingles or metal roofing.
3. Install the Floor Joists: Support the floor joists with a beam running down the center of the shed, and attach them to the bottom plates of the walls. Ensure they are properly spaced and level.
4. Sheathing and Subfloor: Next, install sheathing over the floor joists and the walls. Then, add a subfloor to create a solid base for your flooring.

Step 4: Siding, Roofing, and Windows

With the frame up, it’s time to add the finishing touches.

1. Siding Time: Choose your preferred siding â€" vinyl, wood, or metal. Install it according to the manufacturer's instructions. Make sure it's weather-resistant and adds to the overall look of your shed.
2. Roofing Choices: Decide on your roofing material â€" shingles, metal, or even a green roof. Install the roofing carefully, following the manufacturer's instructions. Make sure it provides adequate weather protection.
3. Windows and Doors: Finally, it's time for the finishing touches â€" install windows and doors. Measure carefully and ensure they are level and properly sealed.

Step 5: Finishing Touches

You’re almost there!

1. Add Insulation: Insulating your shed will help to keep it comfortable year-round. Install fiberglass batt insulation or spray foam insulation in the walls and ceiling. If you plan to use your shed as a workshop or a living space, adding insulation is crucial.
2. Flooring: Now for the floor. Pick your favorite flooring â€" wood, laminate, or even concrete paint â€" and install it over the subfloor.
3. Paint or Stain: Time to give your shed its personality. Choose a paint color that complements your home and landscape. Use a high-quality exterior paint that will withstand the elements. If you want a more natural look, stain the wood siding instead.
4. Electrical and Plumbing: If you plan to use your shed for electricity or plumbing, make sure to consult with a qualified electrician or plumber. They can ensure that everything is installed safely and according to code.

Step 6: The Grand Opening!

Congratulations! You have built your own shed.

Take a step back and admire your creation. It's a true testament to your hard work and dedication. Now, enjoy your new shed â€" the perfect space to store your belongings, pursue your hobbies, or simply relax and enjoy the peace and quiet of your backyard.

Tips and Tricks from a DIY Veteran

Measure Twice, Cut Once: This is the golden rule of carpentry, and it applies especially to building a shed. Take your time measuring and double-check your work before you start cutting.
Use a Level: A level is your best friend. Use it constantly to ensure all your walls, beams, and floor joists are perfectly level. A level shed is a happy shed!
Get Help: Don't be afraid to ask for help, especially for the heavier lifting. A friend or family member can make the process easier and more enjoyable.
Take Breaks: Building a shed is a big project. Take breaks when you need them. Stretch, grab a drink, and come back refreshed and ready to tackle the next step.
Celebrate Your Success: Once you're finished, don't forget to celebrate your hard work. Throw a housewarming party in your new shed, or just enjoy a quiet moment alone, admiring your handiwork.

Building a shed is a rewarding experience. It's a chance to get your hands dirty, learn new skills, and create something tangible that you can enjoy for years to come. Remember, if you have any questions or run into any challenges, there are plenty of online resources, home improvement stores, and experienced DIYers who can offer advice and support. Happy building!

Share:

Cheap 8x12 shed designs for every backyard

Cheap 8x12 shed designs for every backyard


Alright, folks, let's talk sheds! Those little backyard havens that are perfect for storing everything from lawnmowers to Christmas decorations. But who says a shed has to break the bank? We're talking affordable 8x12 shed designs that can fit into any budget, and make your backyard feel a whole lot more organized in the process.

Why 8x12?

Well, it's a sweet spot! Big enough to hold all your stuff, but not so big that it takes over your entire yard. An 8x12 shed can be a practical storage solution for:

Tools and Equipment: Mowers, trimmers, shovels, rakes, and all that wonderful yard care gear finally have a home.
Garden Supplies: Fertilizer, pots, seeds, hoses â€" you name it, an 8x12 can handle it.
Outdoor Furniture: Patio sets, Adirondack chairs, even a hammock can find a safe haven inside.
Hobby Projects: Got a woodworking hobby? An 8x12 shed is the perfect size for a small workshop.
Home Office or Studio: If you work from home or have a creative side, a shed could become your peaceful escape.

The Basics of Budget-Friendly Shed Design

Now, let's talk about the key elements of a cheap, but still awesome, 8x12 shed.

Material Choices: You'll want to keep an eye on costs here.
Pressure-Treated Lumber: A great choice for the base and walls. It's durable and resists rot and moisture.
Plywood: This is a good option for the roof and siding. You can even find pre-cut panels for a faster build.
Metal Roofing: Durable, lightweight, and can be more affordable than shingles.
Vinyl Siding: Easy to maintain and comes in a variety of colors. If you're going for a more modern look, consider a composite siding.

Simple Design: Think about the basic building blocks: walls, a roof, a door, and maybe some windows. The simpler the design, the less materials and labor you'll need.

DIY or Hire Help?: You can save money by doing the building yourself. Check out online resources like YouTube or DIY guides for step-by-step instructions. If you're not a seasoned builder, consider hiring a contractor to help you with the more complex aspects.

Eight 8x12 Shed Designs to Inspire Your Budget Build:

1. The Classic Gable:
This timeless design is simple to build and incredibly practical.
The sloped roof sheds water efficiently.
Add some dormers for natural light and more vertical space.

2. The Lean-To Shed:
Perfect for a tight space, a lean-to shed leans against an existing wall.
This reduces the amount of building materials needed.
Consider adding a small overhang for a covered porch area.

3. The Barn Style:
Gives a rustic charm to your backyard.
Features a wide overhang for a covered entryway.
Can be built with more robust materials for a long-lasting structure.

4. The Modern Minimalist:
Clean lines and simple shapes.
Use contemporary siding materials like composite or metal.
Consider adding a large window or sliding door for a more open feel.

5. The Gambrel Roof:
Offers more storage space with a steeper roof pitch.
Great for a shed that needs to hold taller items.
Can be made with a combination of materials for a unique aesthetic.

6. The A-Frame:
Unique and visually appealing.
Requires more complex framing, so consider if it fits your skill level.
Ideal for a small, cozy shed with an open loft space.

7. The Shed with a Loft:
Provides more storage space while keeping the footprint small.
Perfect for adding a workbench or a creative workspace.
Requires some additional framing and structural support.

8. The Double-Door Shed:
Great for larger items that need easy access.
Consider using sliding doors for a wider opening.
Can be designed with a split gable roof for a unique look.

Tips for Saving Money on Your Shed Build:

Shop around for materials: Check local lumber yards, hardware stores, and online retailers for the best deals.
Consider buying in bulk: Buying larger quantities of lumber, siding, or roofing can result in significant savings.
Utilize recycled materials: Think creatively. Can you use old pallets for framing or recycled wood for the exterior?
Opt for simple features: Avoid elaborate trim work or complex designs that can add to the cost.
Do your research: There are plenty of online resources and DIY guides that can help you save money on labor costs.
Embrace the imperfections: Don't worry about minor imperfections, they can add character to your shed!

Remember, a budget-friendly shed doesn't have to mean sacrificing style or practicality. With a bit of planning and creativity, you can create a beautiful and functional storage solution that complements your backyard and fits your budget.

Now, go out there, grab your tools, and let's build some awesome sheds!

Share:

Garden shed design ideas: diy plans to build your shed for less

Garden shed design ideas: diy plans to build your shed for less


Hey there, fellow green thumbs! Let's talk sheds. You know, those little havens in your garden that hold all your tools, potting supplies, and maybe even a comfy chair for enjoying a morning coffee while watching the birds.

But let's face it, sometimes the price tags on those pre-built sheds can be a bit daunting. Don't worry, because building your own DIY shed is totally doable and way more rewarding! Plus, it gives you the satisfaction of knowing you created something amazing with your own two hands.

So, grab a cup of coffee, a notepad, and your trusty measuring tape, and let's dive into the world of DIY garden shed building!

First Things First: Planning is Key

Before you start hammering and sawing, it's crucial to plan out your shed. This is where you get to be the architect, and it's way more fun than you think!

Size Matters: How much stuff do you need to store? A good rule of thumb is to measure the largest items you want to fit in the shed, then add a bit of extra space for wiggle room. Don't forget about your future needs, too!
Location, Location, Location: Think about the best spot for your shed in your garden. You'll want to consider sunlight, access, and potential drainage issues.
Design Inspiration: Browse online for shed designs you like. You can even find free shed plans online! Maybe you want a traditional shed with a gable roof, a funky modern design, or even a shed with a little porch for relaxing.

Materials and Tools: Choosing the Right Gear

Now comes the fun part: choosing your building materials. Remember, you're on a budget here, so we're going for smart and cost-effective choices.

Wood: Pressure-treated lumber is a great option for the foundation and floor of your shed. For the walls and roof, you can choose from a range of wood options, like plywood, OSB, or even reclaimed wood.
Roofing: Asphalt shingles are affordable and durable. Metal roofing is another great option, especially if you're looking for something that's fire-resistant and long-lasting.
Doors and Windows: You can find affordable doors and windows at your local hardware store, or even snag them from a salvage yard if you're feeling adventurous!
Hardware: Don't forget the essentials like screws, nails, hinges, and a lock!

Don't Forget Your Tools!

Measuring Tape: You'll need this for every step of the process.
Level: Makes sure your shed is nice and straight!
Saw: A circular saw or jigsaw will come in handy for cutting wood.
Drill: Use this for drilling pilot holes and attaching hardware.
Hammer: For those satisfying nail-driving moments.
Safety Gear: Always protect yourself with safety glasses, work gloves, and ear protection.

Let's Build!

Now that you have your plan, materials, and tools, it's time to get building! Here's a step-by-step guide to get you started:

1. The Foundation:

Level the Ground: Use a level to make sure the ground is flat.
Build the Foundation: You can use pressure-treated lumber to create a simple frame for your shed.
Install a Floor: Lay down plywood or OSB for your shed floor.

2. Building the Walls:

Frame the Walls: Cut your lumber to size and assemble the wall frames.
Add Sheathing: Attach plywood or OSB to the wall frames.
Insulate: Adding insulation to your walls will make your shed more energy-efficient and comfortable.

3. Construct the Roof:

Build the Rafters: Cut and assemble the rafters to create the roof frame.
Add Roof Sheathing: Attach plywood or OSB to the rafters.
Install Roofing: Shingle or metal roofing can be easily installed on top of the roof sheathing.

4. Finishing Touches:

Install Doors and Windows: Cut openings for doors and windows and install them securely.
Add Trim: Add some decorative trim around doors, windows, and the roofline for a polished look.
Paint or Stain: Choose a paint or stain to protect your shed from the elements and add your own personal touch.

Tips and Tricks:

Start Simple: If you're a beginner, start with a simple shed design. You can always build more complex designs later.
Ask for Help: Don't be afraid to ask friends or family members for help.
Take Breaks: Building a shed can be tiring, so take breaks and enjoy the process.
Be Patient: Building a shed takes time, so be patient and focus on enjoying the journey.

And remember, building a shed is a project, not a race. Take your time, enjoy the process, and don't be afraid to make mistakes! You'll end up with a beautiful and functional shed that you can enjoy for years to come.

Bonus Ideas:

Add a Porch: Create a cozy spot to relax and enjoy your garden.
Install a Skylight: Let in natural light and brighten up your shed.
Add Shelves and Storage: Optimize your space for all your gardening essentials.

So go forth and build your dream shed! With some planning, creativity, and a little elbow grease, you can create a beautiful and functional outdoor space that you'll love for years to come.

Share: