How to Build a Lean-To Shed: A Quick and Simple DIY Guide
Dreaming of extra storage space but dreading complex construction projects? A lean-to shed is the perfect solution! This simple structure, attached to an existing building, offers ample storage with minimal effort. This guide provides a step-by-step walkthrough, empowering you to build your own lean-to shed with confidence.
Planning Your Lean-To Shed
Before you grab your tools, careful planning is crucial. First, determine the desired dimensions of your shed. Consider the available space against your existing building and the amount of storage you need. Next, secure the necessary permits from your local authorities; this step varies by location but is essential to avoid legal issues. Finally, sketch a detailed plan, including measurements for the walls, roof, and foundation. This plan will serve as your roadmap throughout the construction process, ensuring a smooth and efficient build.
Choosing Your Materials
Selecting the right materials impacts both the durability and the aesthetics of your lean-to. Pressure-treated lumber provides excellent rot resistance, making it ideal for the foundation and framing. For the roof, consider asphalt shingles for their affordability and ease of installation. Don't forget about fasteners â€" choose galvanized nails and screws for longevity. Finally, obtain any necessary concrete for the foundation, if needed. A well-considered material list ensures you have everything on hand before beginning.
Building the Foundation
A sturdy foundation is the cornerstone of any successful shed. If your lean-to is small and the ground is level, you can use a simple gravel base. However, for larger structures or uneven terrain, a concrete slab provides superior stability. Level the ground thoroughly before pouring the concrete (if applicable), ensuring a perfectly flat surface. Allow ample time for the concrete to fully cure before proceeding to the next step. Remember, a solid foundation ensures your lean-to will stand the test of time.
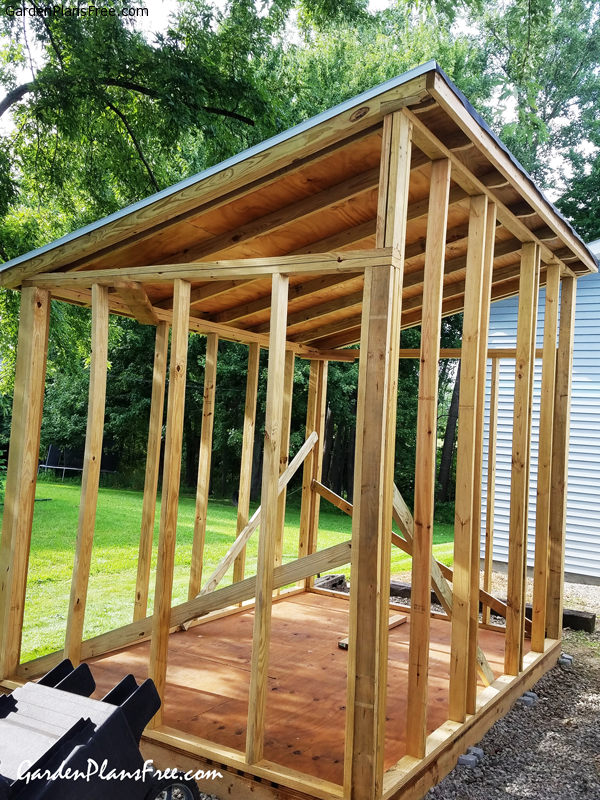
Framing the Walls and Roof
With the foundation in place, you're ready to frame your lean-to. Begin by constructing the side walls, using your pre-cut lumber and ensuring all corners are square. Next, attach the walls to your existing building, securing them firmly with appropriate fasteners. For the roof, construct rafters and connect them to the top of the walls. Consider using a ridge board at the peak of the roof for added support and stability. Precise measurements and careful construction are vital at this stage for a structurally sound lean-to.
Important Considerations for Framing
During framing, take extra care to:
- Use a level to ensure all framing members are plumb and square.
- Pre-drill holes for screws to prevent wood from splitting.
- Employ appropriate safety measures, including wearing safety glasses and gloves.
Roofing and Finishing Touches
Once the framing is complete, it's time to install the roofing material. Start by applying underlayment to protect the wood from moisture. Then, carefully install your chosen roofing material, following the manufacturer's instructions. Finally, add flashing around the edges of the roof where it meets the walls and existing building to prevent water leakage. After roofing, consider adding finishing touches like doors, windows, and any desired siding. These final steps will transform your basic structure into a functional and attractive shed.
Safety First!
Throughout the entire process, prioritize safety. Wear appropriate safety gear, including safety glasses, work gloves, and sturdy footwear. Use caution when working with power tools and always ensure your work area is well-lit and free of obstacles. If you're unsure about any aspect of the construction, seek professional advice to avoid accidents and ensure a successful project.


No comments:
Post a Comment