Hey there, fellow green thumbs! Let's talk sheds. You know, those little havens in your garden that hold all your tools, potting supplies, and maybe even a comfy chair for enjoying a morning coffee while watching the birds.
But let's face it, sometimes the price tags on those pre-built sheds can be a bit daunting. Don't worry, because building your own DIY shed is totally doable and way more rewarding! Plus, it gives you the satisfaction of knowing you created something amazing with your own two hands.
So, grab a cup of coffee, a notepad, and your trusty measuring tape, and let's dive into the world of DIY garden shed building!
First Things First: Planning is Key
Before you start hammering and sawing, it's crucial to plan out your shed. This is where you get to be the architect, and it's way more fun than you think!
Size Matters: How much stuff do you need to store? A good rule of thumb is to measure the largest items you want to fit in the shed, then add a bit of extra space for wiggle room. Don't forget about your future needs, too!
Location, Location, Location: Think about the best spot for your shed in your garden. You'll want to consider sunlight, access, and potential drainage issues.
Design Inspiration: Browse online for shed designs you like. You can even find free shed plans online! Maybe you want a traditional shed with a gable roof, a funky modern design, or even a shed with a little porch for relaxing.
Materials and Tools: Choosing the Right Gear
Now comes the fun part: choosing your building materials. Remember, you're on a budget here, so we're going for smart and cost-effective choices.
Wood: Pressure-treated lumber is a great option for the foundation and floor of your shed. For the walls and roof, you can choose from a range of wood options, like plywood, OSB, or even reclaimed wood.
Roofing: Asphalt shingles are affordable and durable. Metal roofing is another great option, especially if you're looking for something that's fire-resistant and long-lasting.
Doors and Windows: You can find affordable doors and windows at your local hardware store, or even snag them from a salvage yard if you're feeling adventurous!
Hardware: Don't forget the essentials like screws, nails, hinges, and a lock!
Don't Forget Your Tools!
Measuring Tape: You'll need this for every step of the process.
Level: Makes sure your shed is nice and straight!
Saw: A circular saw or jigsaw will come in handy for cutting wood.
Drill: Use this for drilling pilot holes and attaching hardware.
Hammer: For those satisfying nail-driving moments.
Safety Gear: Always protect yourself with safety glasses, work gloves, and ear protection.
Let's Build!
Now that you have your plan, materials, and tools, it's time to get building! Here's a step-by-step guide to get you started:
1. The Foundation:
Level the Ground: Use a level to make sure the ground is flat.
Build the Foundation: You can use pressure-treated lumber to create a simple frame for your shed.
Install a Floor: Lay down plywood or OSB for your shed floor.
2. Building the Walls:
Frame the Walls: Cut your lumber to size and assemble the wall frames.
Add Sheathing: Attach plywood or OSB to the wall frames.
Insulate: Adding insulation to your walls will make your shed more energy-efficient and comfortable.
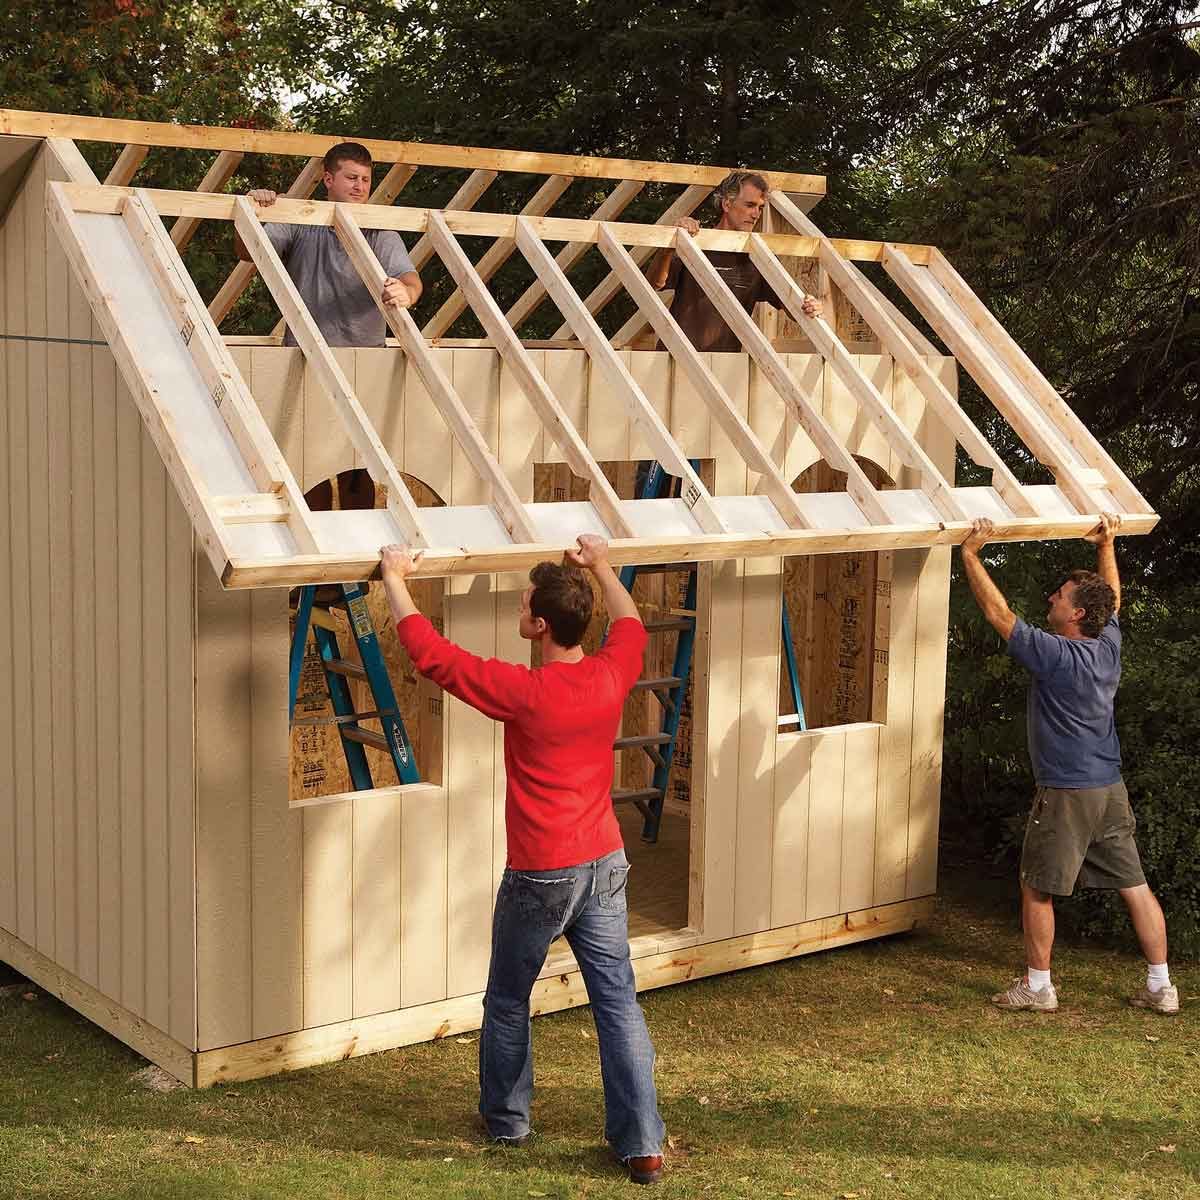
3. Construct the Roof:
Build the Rafters: Cut and assemble the rafters to create the roof frame.
Add Roof Sheathing: Attach plywood or OSB to the rafters.
Install Roofing: Shingle or metal roofing can be easily installed on top of the roof sheathing.
4. Finishing Touches:
Install Doors and Windows: Cut openings for doors and windows and install them securely.
Add Trim: Add some decorative trim around doors, windows, and the roofline for a polished look.
Paint or Stain: Choose a paint or stain to protect your shed from the elements and add your own personal touch.
Tips and Tricks:
Start Simple: If you're a beginner, start with a simple shed design. You can always build more complex designs later.
Ask for Help: Don't be afraid to ask friends or family members for help.
Take Breaks: Building a shed can be tiring, so take breaks and enjoy the process.
Be Patient: Building a shed takes time, so be patient and focus on enjoying the journey.
And remember, building a shed is a project, not a race. Take your time, enjoy the process, and don't be afraid to make mistakes! You'll end up with a beautiful and functional shed that you can enjoy for years to come.
Bonus Ideas:
Add a Porch: Create a cozy spot to relax and enjoy your garden.
Install a Skylight: Let in natural light and brighten up your shed.
Add Shelves and Storage: Optimize your space for all your gardening essentials.
So go forth and build your dream shed! With some planning, creativity, and a little elbow grease, you can create a beautiful and functional outdoor space that you'll love for years to come.


No comments:
Post a Comment